pwndocs
pwndocs is a dummy-friendly guide to pwn.
The goal of this guide is to not only teach people the basics of pwn, but help them gain an understanding of what actually happens under the hood.
By helping to overcome the daunting initial step, hopefully people will gain the motivation and know-how to venture into more advanced/complicated topics on their own.
This blog is still heavily a work-in-progress. Stay tuned to my twitter to stay up to date with the development of this guide.
About Me
I am Elma, a university student residing in Singapore.
You can find out more about me at my blog.
This guide is purely a passion project of mine.
If you enjoy the content, it would be awesome if you could buy me a coffee!
Pwn By Example
Inspired by Solidity by Example, this section aims to ease the reader's understanding of pwn by presenting detailed walkthrough of simplified challenges.
In order to maximize your learning, I would recommend that you download and try the challenge for yourself before reading the writeup. After reading and understanding the writeup, attempt to solve it on your own from scratch without referring back to the writeup.
After all, this guide is only a means to aid in your learning. Most of the learning will only happen when you try it for yourself!
how2pwn?
At some point, everyone has their own method as to how to approach a CTF pwn challenge. However, when you're starting out, it is perfectly normal to find yourself totally lost when faced with a program and unsure as to where to begin looking or what to do.

A Textbook Approach to Pwn
If you already have some experience in doing Pwn challenges and are fairly confident in it, feel free to move ahead and skip this section!
If you are totally new and need a guideline on how you can best approach a challenge, this is for you. We will explore a 5 step process on how we can approach and attempt to solve a pwn challenge.
- Running and Fuzzing the Program
- Analyzing the Source Code
- Understanding the Exploit
- Writing the Exploit
- Debug your Exploit
Let's see what each of these steps entails.
1. Running and Fuzzing the Program
Fuzzing is when we provide invalid, malformed, or unexpected inputs into a system to reveal software defects and vulnerabilities. (i.e. large strings, negative integers etc.)
In short, we try to input as much nonsense as we can to break a program!
Running the program is extremely important as it helps us gain a very quick understanding of the program functionalities.
Fuzzing the program helps us to potentially find bugs in a program quickly. If we are able to crash the program, it might imply that there is a vulnerability that we can exploit!
2. Analyze the Source Code
Running the program only shows us what the program wants us to see, but we are blind to other things that the program may be doing under the hood.
We will have to analyze the code of the program to gain a better understanding of how the program works. This is known as static analysis.
-
If the program crashed in step 1, this is where you triage and find out what bug is present in the program.
-
The idea of source code analysis is to have a brief understanding on what each function does in general.
When we try to look for vulnerabilities in a source code, one tip is to look out for inputs that a program takes in. Are these inputs vulnerable? This could be our entrypoint to triggering a bug!
If the source code is not provided to us, we will have to go one step further to use a tool such as IDA/Ghidra to reverse engineer the program. Find out more here
3. Understand the Exploit
If you have reached this stage, it means that you have already found a vulnerability from the previous 2 stages.
Ask yourself some questions:
-
What kind of vulnerability is it?
-
What does this vulnerability allow us to do?
-
What is our end goal and what do we want to accomplish?
Start planning how you can make use of the vulnerability to accomplish your objective.
4. Writing the Exploit
We typically write our exploits using the pwntools python library.
pwntools is a python library that is used to easily interact with executables/remote services and also comes with many convenient functionalities specific to pwning.
You can find a pwntools guide here, but ultimately, you will only become familiar with it through practice.
5. Debugging the Exploit
Most of the time, even if we have planned out and written our exploit, it is not going to work out of the box.
A huge part about writing exploits is also the ability to debug it. Attach your debugger to your pwntools script with gdb.attach(p).
Using the debugger, why did the program crash? What instruction did it crash on?
What are you expecting to see in your debugger? (i.e. if doing ROP, you expect to see your ROP chain at the ret instruction on the top of the stack)
Does your exploit work as intended? Why not and how can we fix it?
Conclusion
Definitely, if you are a pro and have your own workflow, then you don't have to strictly follow this. This is merely a recommendation for beginners who are totally lost.
Most of the guides in this chapter will follow the structure covered above.
Return Oriented Programming
In this guide, we will attempt to solve the following challenge. I strongly encourage you to download these files and try it out for yourself/follow along.
Miscellaneous
If you are pwning and you have yet to face any weird unexplainable pitfalls/bugs so far, you are probably not pwning enough.

Sometimes we encounter random bugs that other people don't face, despite taking the exact same steps documented in any guidebook. This creates a false sense of difficulty and a barrier of entry, especially to newbies who are already struggling with the crucial concepts itself.
This section aims to document some environmental issues that we might encounter when we attempt pwn challenges (or even play CTFs for that matter).
Apart from that, weird random topics that are difficult to classify will also be parked in this section.
The Infamous MOVAPS issue
If you are attempting to write a ROP chain, and your program crashes at some weird movaps instruction, chances are that you are facing a stack alignment issue. This is also the cause of many exploits "working locally but not remotely".
Analyzing a MOVAPS crash
Let's first look at what a typical crash brought about by MOVAPS looks like in GDB.
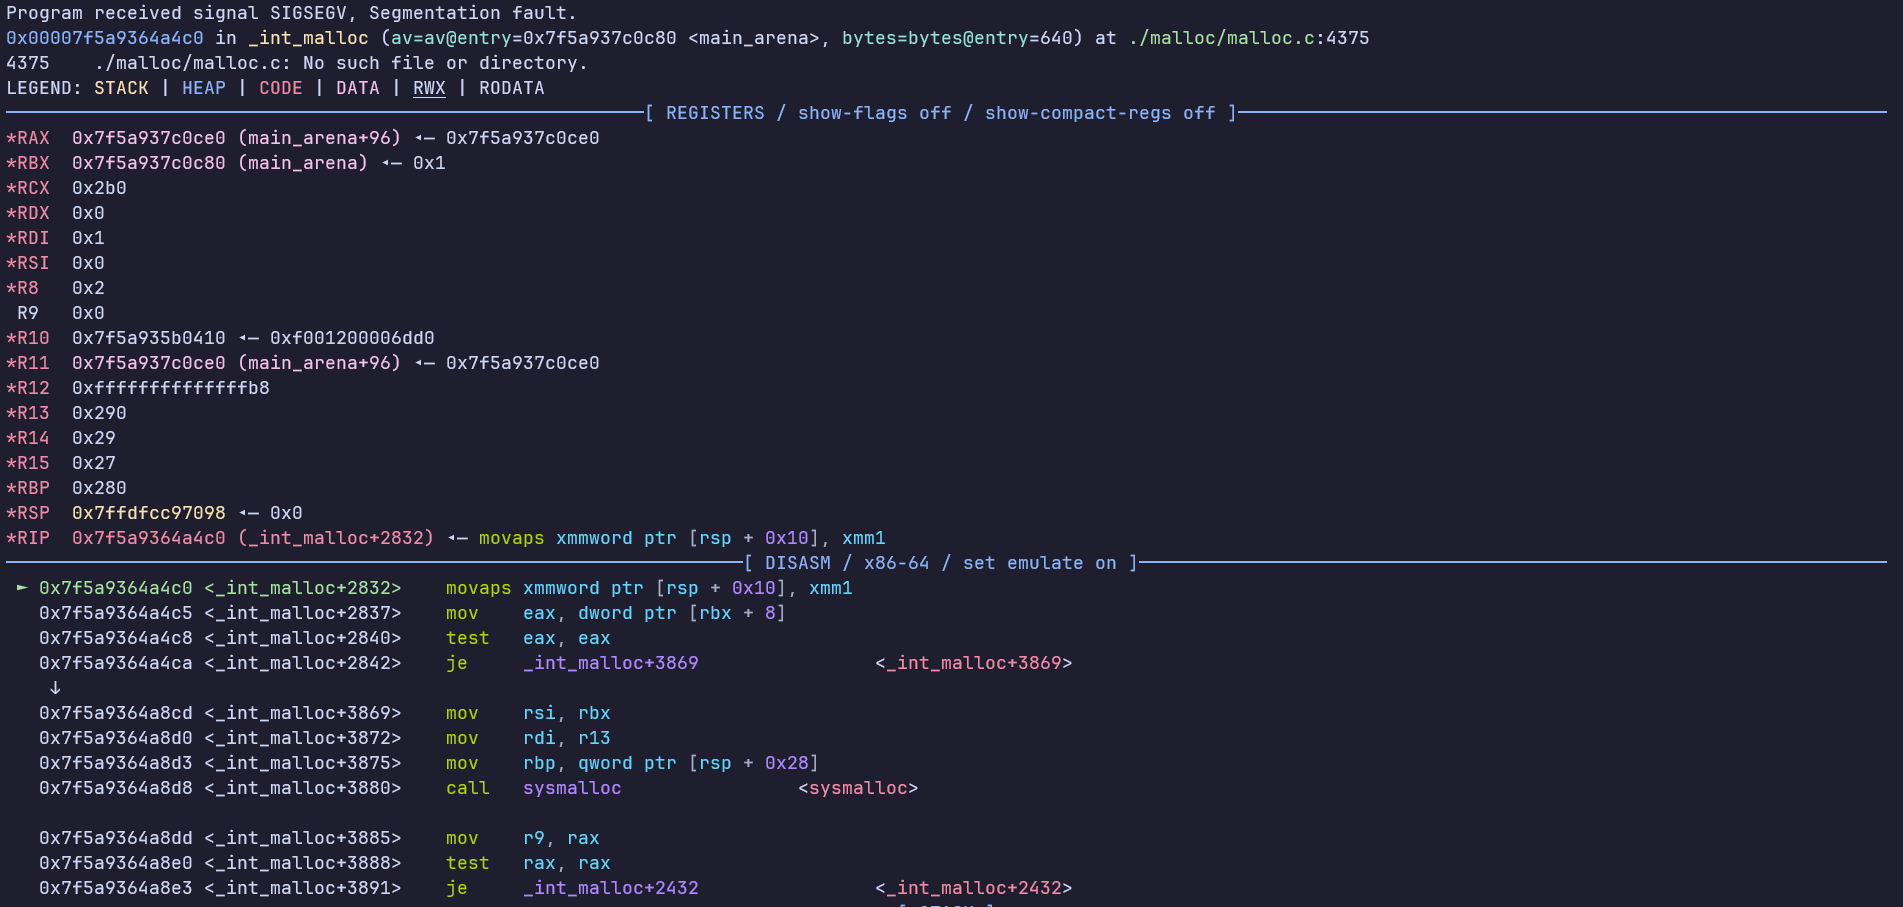
As you can see, the program crashes with Segmentation Fault upon hitting the movaps instruction.
*RSP  0x7fffa09ee928 ◂— 0x0
...
<_int_malloc+2832>    movaps xmmword ptr [rsp + 0x10], xmm1
Looking at this movaps documentation, it mentions that
When the source or destination operand is a memory operand, the operand must be aligned on a 16-byte (0x10) boundary or a general-protection exception (#GP) is generated.
This basically means that our memory address that is referenced has to be a multiple of 0x10 bytes. However, in this case, our memory operand is 0x7fffa09ee928+0x10=0x7fffa09ee938 -- evidently not a multiple of 0x10.
Fixing the MOVAPS issue
In order to align our stack, we simply have to increment or decrement our RSP by 0x8. This means that as long as we push or pop a value on our stack before we call the function, we should be able to align our stack! There's so many different ways we can do this, but I will cover the two simplest way.
Add an additional ret
Assuming that you have a ROP chain, we can simply add a ret instruction/gadget before we call our function.
Skip the function prologue
Assume we are trying to call a function win() that looks like this
void win() {
    system("/bin/sh");
}
The assembly for such a function will look like this:
Dump of assembler code for function win:

   // function prologue
   win+0:     endbr64
   win+4:     push   rbp
   win+5:     mov    rbp,rsp

   // load argument
   win+8:     lea    rax,[rip+0xeac]        # 0x2004
   win+15:    mov    rdi,rax

   // call system
   win+18:    call   0x1050 <system@plt>

   // function epilogue
   win+23:    nop
   win+24:    pop    rbp
   win+25:    ret
As we can see, the only relevant part of the code starts from win+8.
If we face a movaps issue, we can simply return to win+5 or win+8 directly, skipping the initial push rbp instruction.
This would offset our RSP by 8, and fix the stack alignment issue (if any).